Whether you’re looking to make a fake birthday cake or cake prop for your home, this easy-to-follow tutorial has you covered. Learn how to make your own fake cake with just a few basic materials and no professional cake decorating skills required!
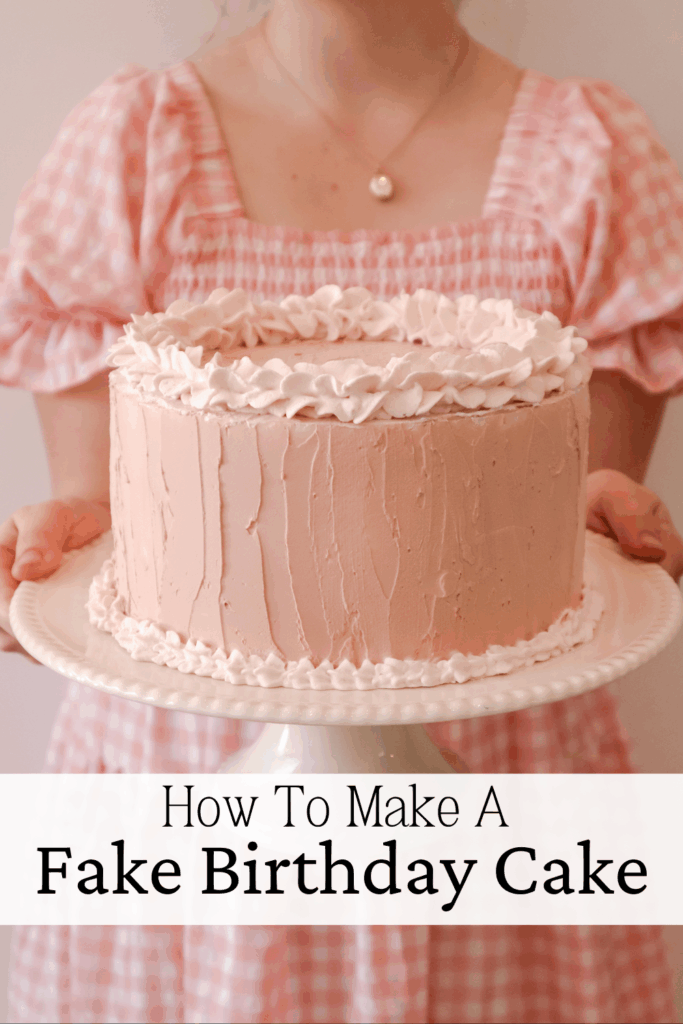
Cake decorating can be so fun, and sometimes your cake is even too beautiful to eat! But with a fake birthday cake, you can enjoy your stunning cake forever!
There are several reasons why you may require an artificial cake. Perhaps for a table centrepiece, a baking store front or birthday party props. And by making a fake cake, you save the time and effort of baking!
In this tutorial, you will learn the materials needed and the steps to make a fake birthday cake.
By the end, you will have learnt the basics of how to make these cakes so you can go create your own masterpiece.
This post is all about how to make a fake birthday cake.
Fake Birthday Cake Tutorial
Materials:
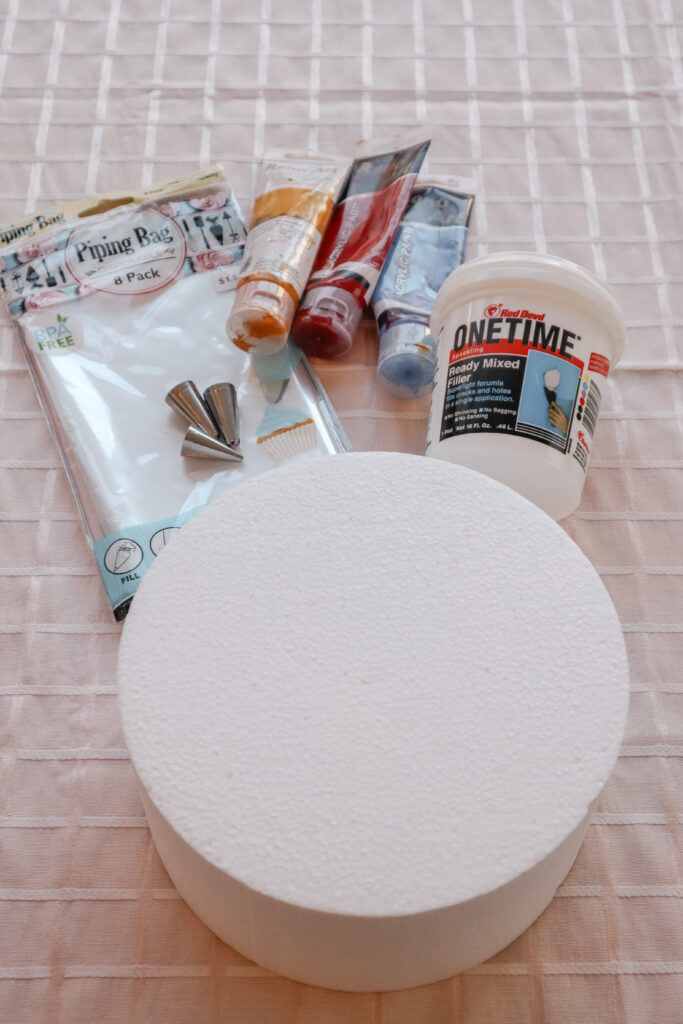
- Styrofoam Cake Round
- Lightweight Spackling
- Acrylic Paint
- Straight Metal Spatula or Knife
- Piping Bags + Nozzles *optional
Step 1: Prepare the Base
I liked the depth of my one styrofoam round, therefore, it didn’t require any prep work. But if you want a taller or teared cake glue your cake rounds together and using some spackle to even any gaps between the layers.
Step 2: Mix your Icing Colors
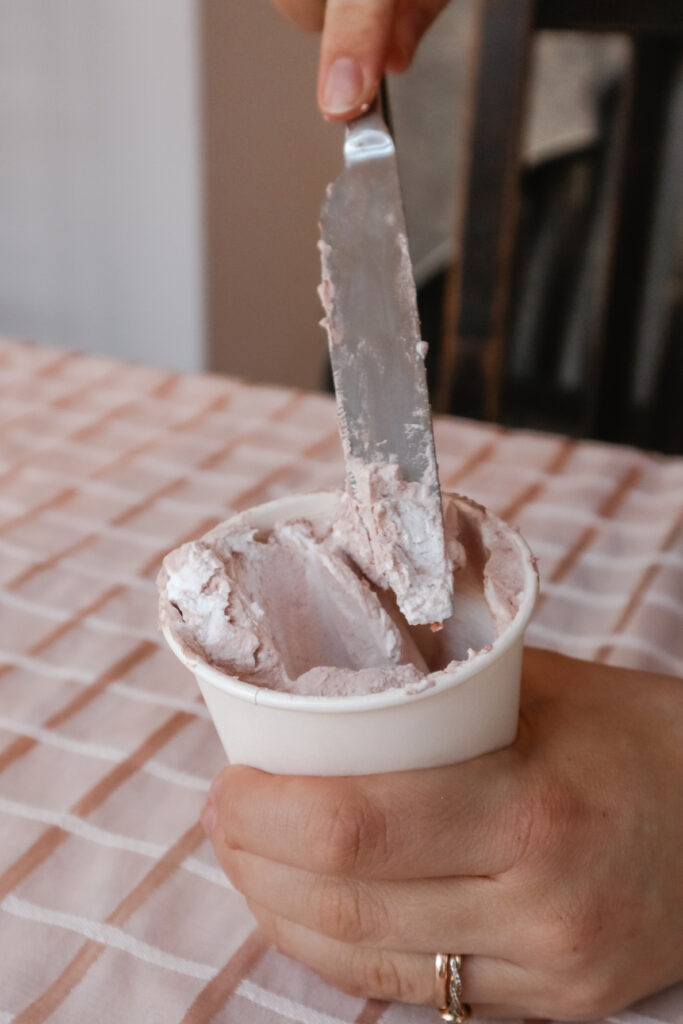
To change the color of your spackling, simply add small amounts of acrylic paint and mix until your desired color.
I found the consistency of the spackling to be slightly thick at the time. If this is the case, you should be able to add a tiny dash of water to soften it.
Step 3: Ice Your Cake Base
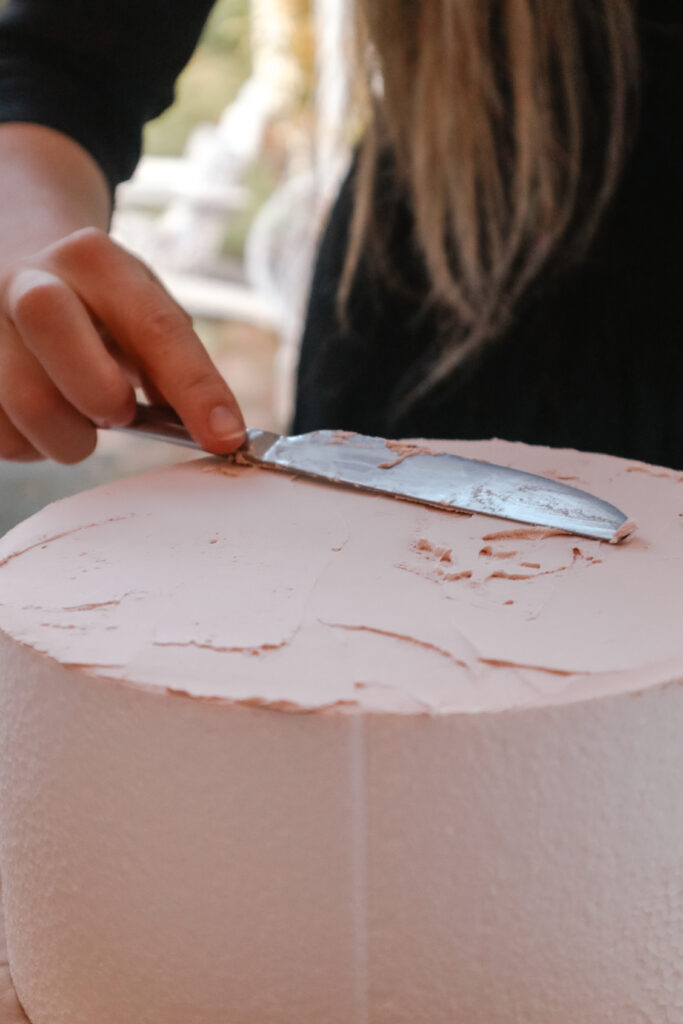
Once you’re happy with the color of your base icing, use a spatula or the flat side of a knife to evenly ice your cake. I went for a rustic style icing to give it that soft butter-cream look.
Let this set overnight. Or you can speed up the process using a hair dryer.
If you are not confident with piping, this is a great place to finish your cake. You could simply add a few flowers to the top for an extra touch.
Step 4: Adding Piped Details
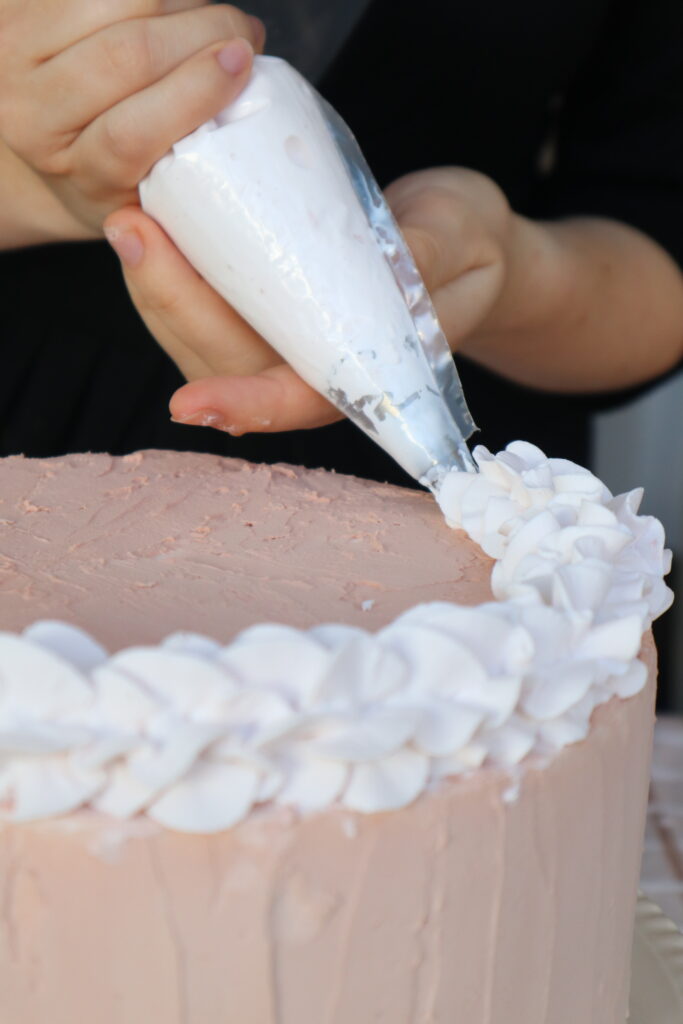
Now, I am no professional and found this part tricky. Perfecting your piping is just a matter of trial and error. I’d recommend testing on baking paper before going straight onto the cake.
The icing is also made from spackling. I added some water to make the spackling slightly less fluffy and easier to pipe.
It’s also great to have some inspiration photos on hand for this step.
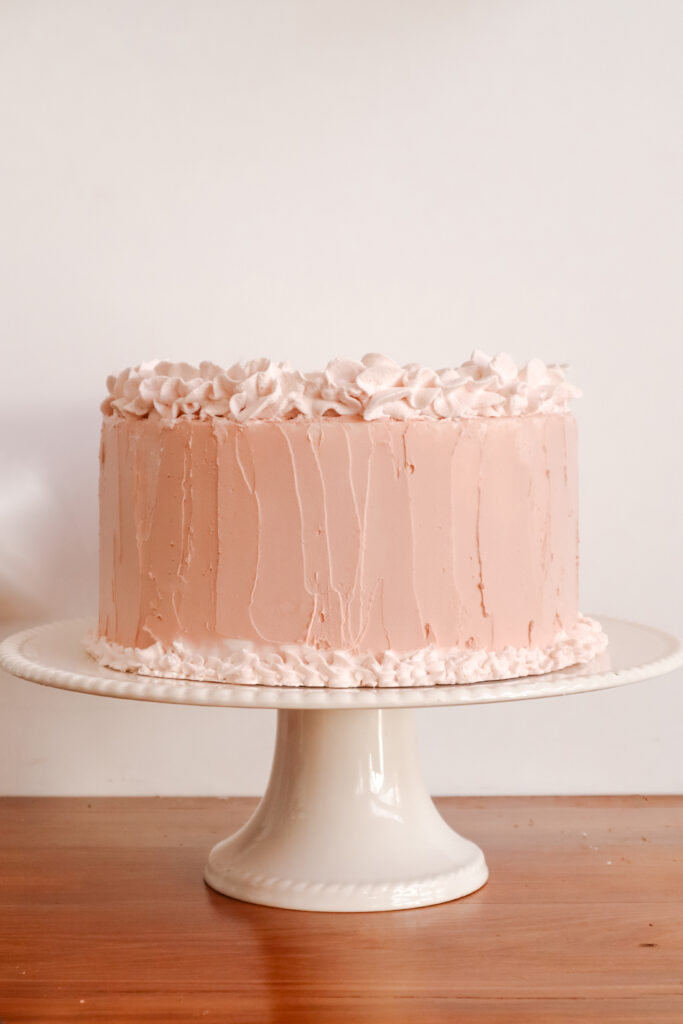
Make sure to leave your decorated cake to fully dry before trying to move or use. I left mine for 2 days.
You’re Done!
And that’s it! I hope you’ve had as much fun creating your cake as I did.