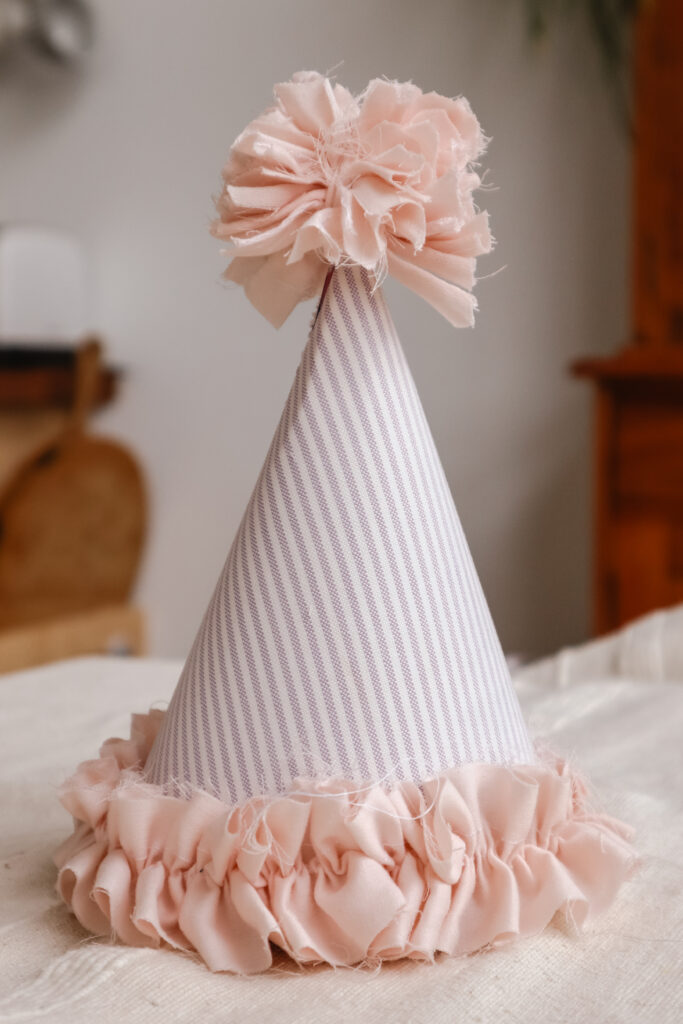
Learn how to make your own vintage-inspired DIY Birthday Hat with this step-by-step tutorial and free printable pattern! These gorgeous party hats are sure to make your kids smile brightly for their special day.
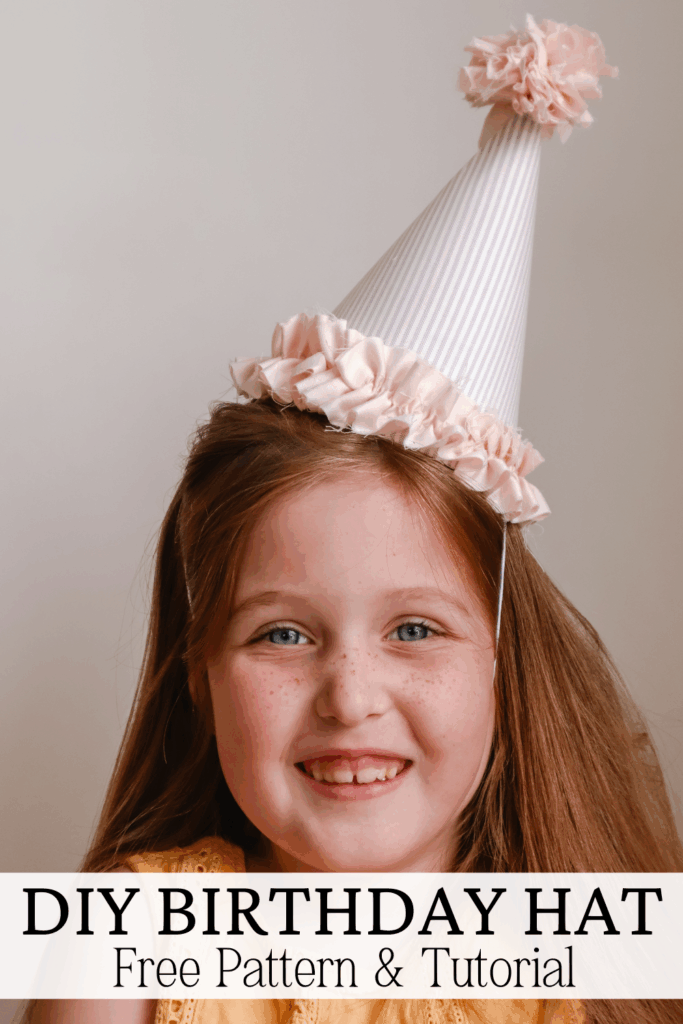
I am so excited to share this DIY birthday hat tutorial! These cone party hats are easy to make, require very few materials and are so much more beautiful than anything you’ll find in the party store.
In this tutorial, you will learn all the materials required, how to assemble your party hat, as well as a free party hat template!
By following these steps, you’ll be left with a unique handmade fabric party hat which can be used for many birthdays to come.
This post is all about how to make a DIY birthday hat.
DIY Birthday Hat: Free Pattern & Tutorial
Materials:
- Main Fabric (roughly 21cm x 30cm required)
- Secondary Fabric or ribbon
- Card or Interfacing
- Elastic String
- Thread
- Scissors
- Sewing Machine
- Hot Glue Gun
Step 1: Print & Cut Your Pattern
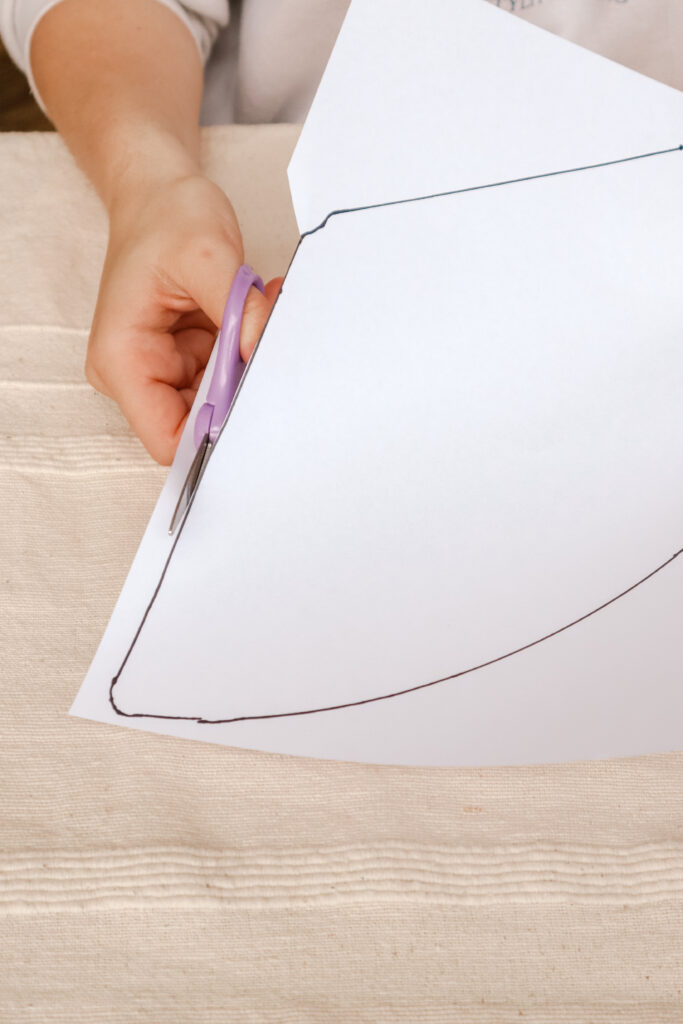
Begin by downloading and printing your pattern on A4-sized paper. To get your free pattern, simply click the download button below.
Once your pattern is printed, cut around the outside lines.
Step 2: Cut Your Hat Pieces

Pin your pattern piece to your main fabric and cut around the outside.
Using the same pattern, trace around it onto your card or iron-on interfacing. This is what will be used to stiffen our hat. I chose to use card as the interfacing was quite expensive.
For the frills at the base of your hat you will want to cut a long strip from your secondary fabric. This should be approximately 5cm wide x 160cm long.
You will also need extra of your secondary fabric for the pom-pom we will make further on.
Step 3: Attach Your Main Fabric & Backing
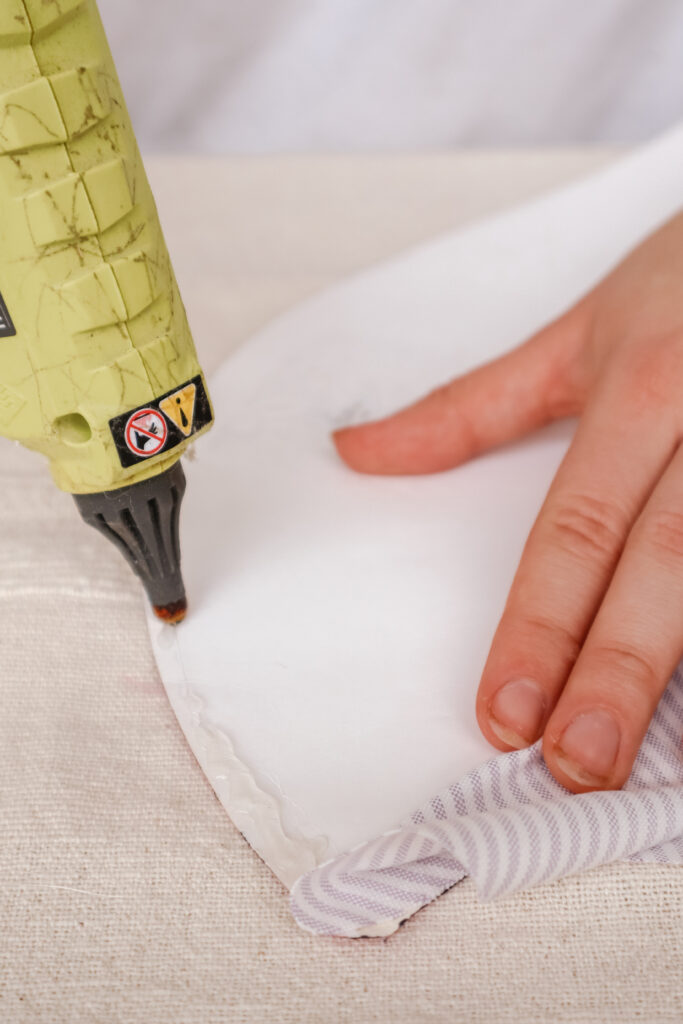
If you’re using card as your backing, take your hot glue gun and glue the edges together.
If you’re using interfacing, take your iron and iron on your interfacing. Using interfacing will give you a nicer finish at the back of your hat.
Set this piece aside and begin making your frill for the base.
Step 4: Basting Stitch Your Frill Piece
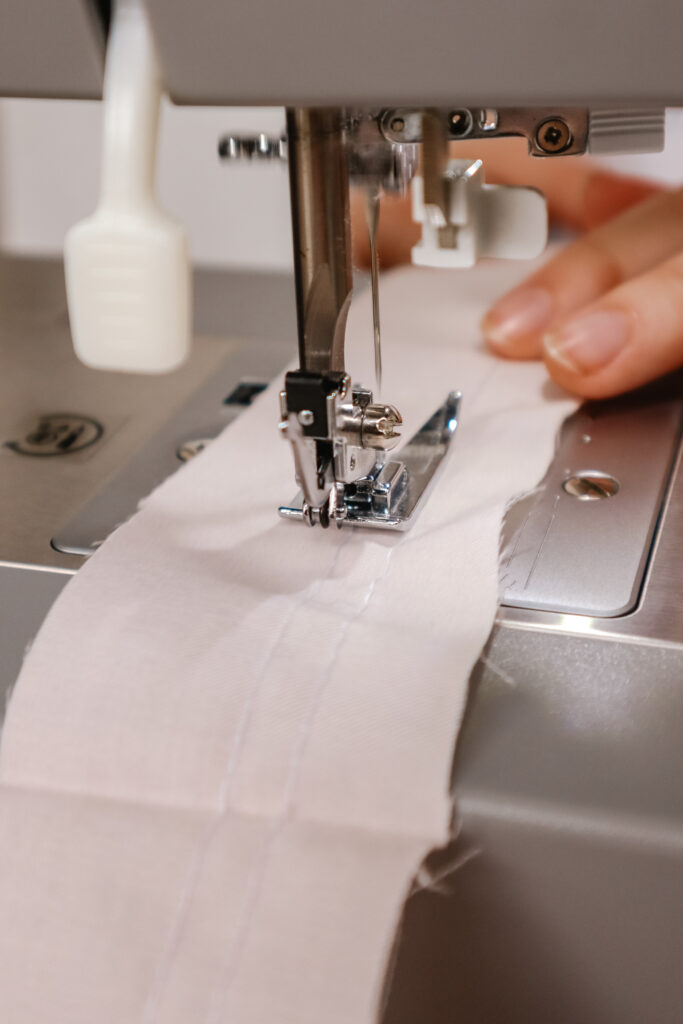
With your machine set to the longest stitch, sew two straight lines through your frill piece. Make sure not to backstitch at the beginning or end.
Step 5: Gather Your Fabric
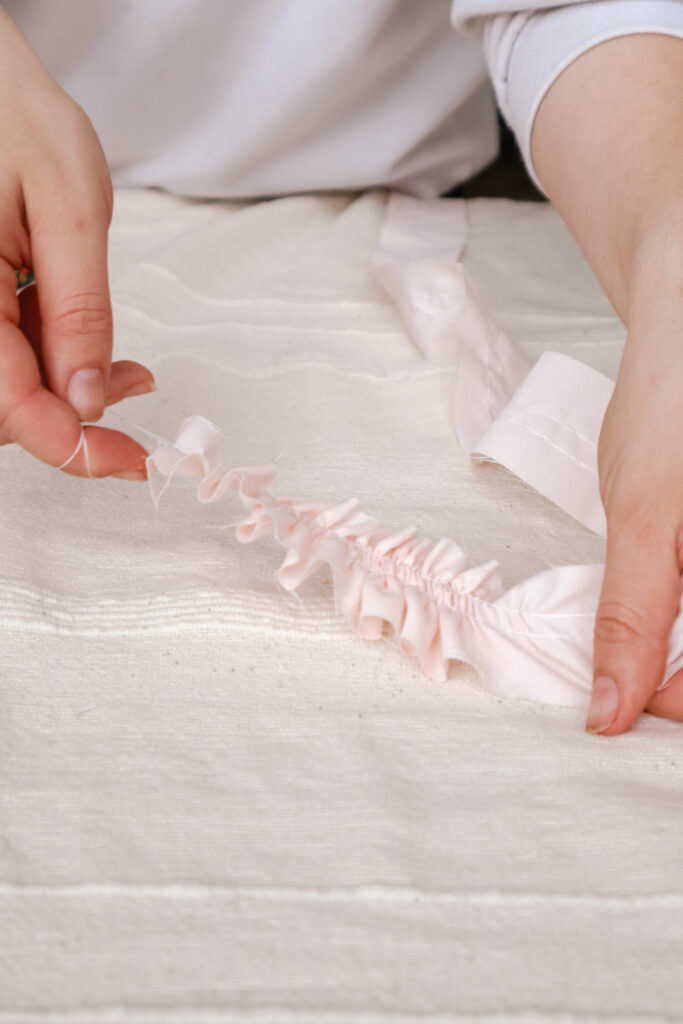
Hold your top two threads between your thumb and index finger, then hold your fabric in the other. Slowly pull the threads and gather your fabric.
Continue to do this until your frill is the circumference of the base of your hat.
Step 6: Attach Your Frill
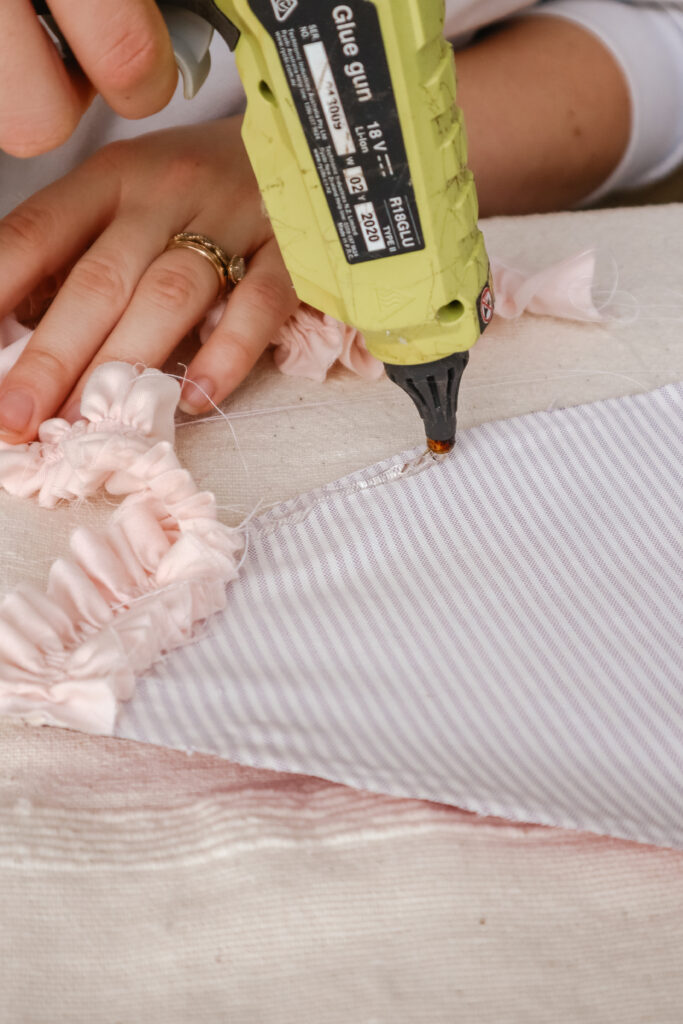
Using your hot glue gun, glue down your frill to the base of your hat.
Step 6: Turn Your Hat into a Cone
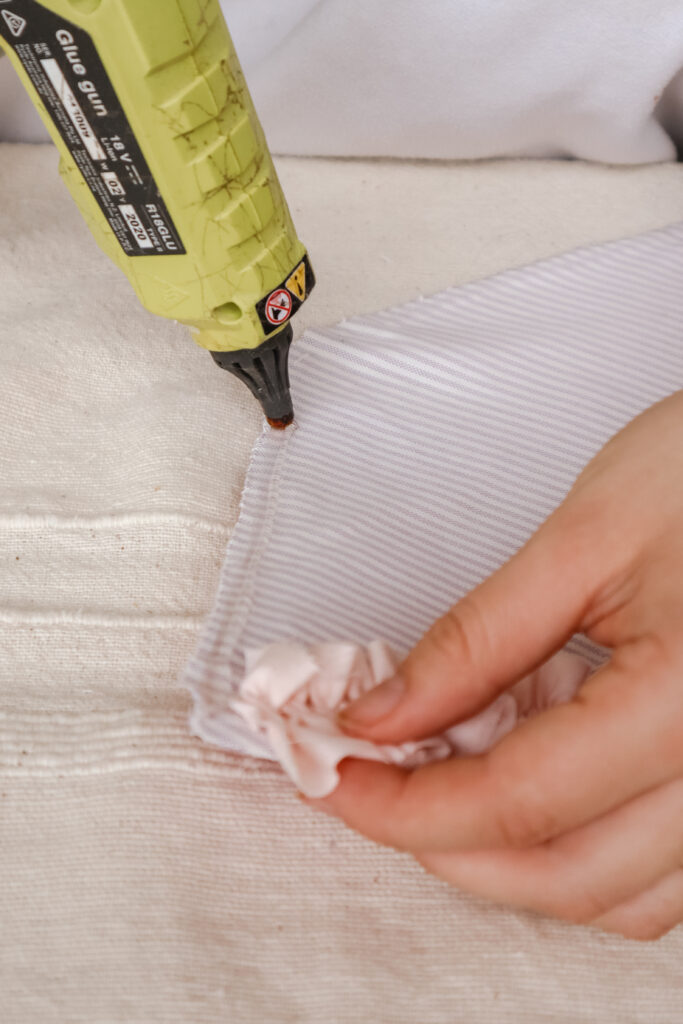
Add a strip of hot glue along one of the straight edges of your hat. Make sure to trim your frill about a cm short of the end to leave room for the overlap.
Press the two straight edges together, forming a cone shape and hold until the glue is set.
Step 7: Making the Pom-Pom
To make the pom-pom, begin by cutting or tearing strips of your secondary fabric 1-2cm wide. You will need between 1-2 meters of this depending how full you want your pom-pom to be.
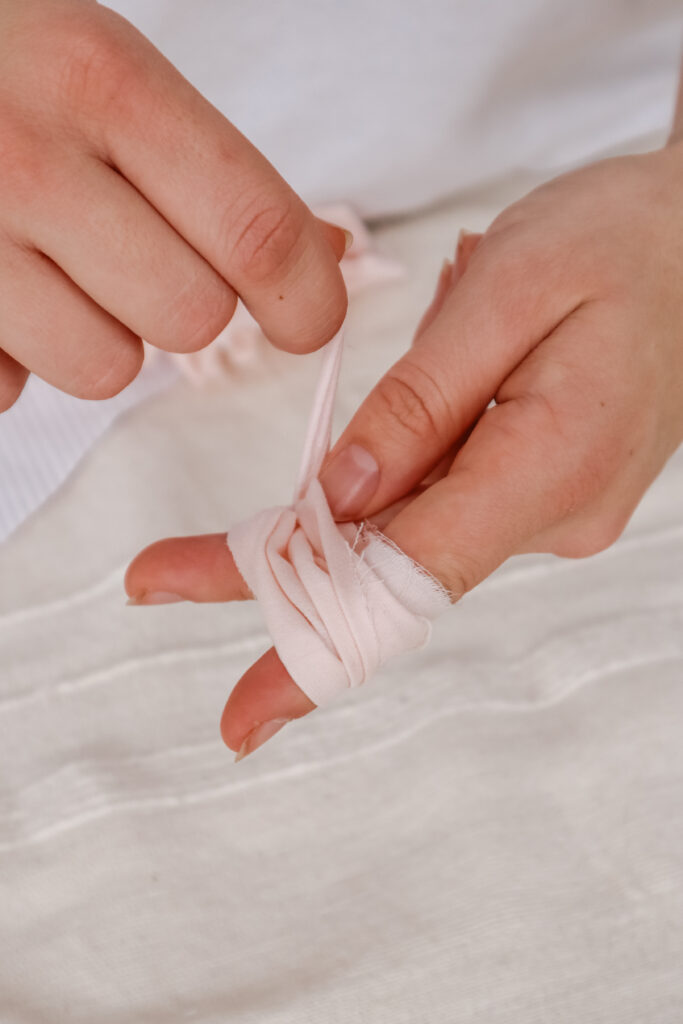
Using your index and middle finger, slightly separate them and begin wrapping your fabric around them.
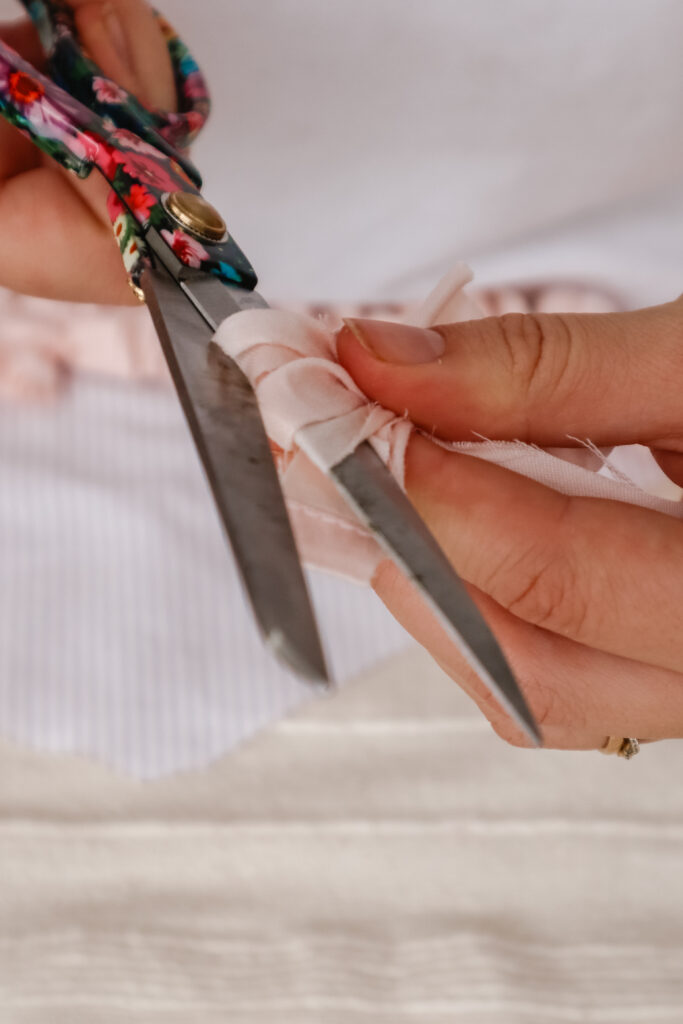
Continue this until the end of your fabric. Then, using a small strip, tie it in the middle of the bundle. Slip the bundle off your fingers and cut open all the loops.
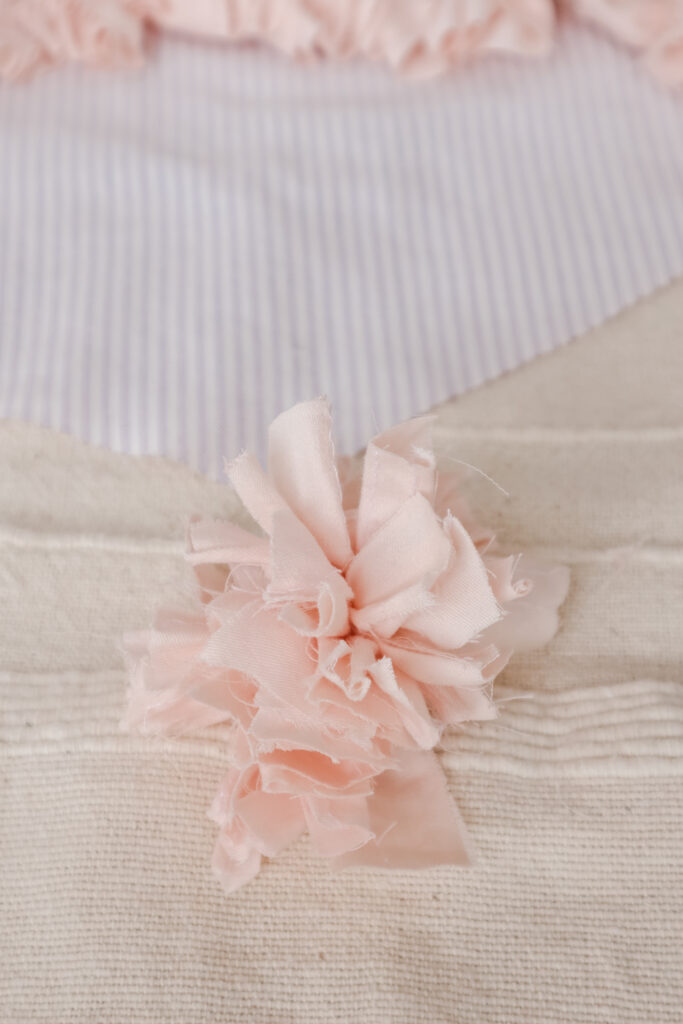
Trim your pom-pom if needed, and you’re done! Now we are ready to attach the pom-pom.
Step 8: Attach Your Pom-pom
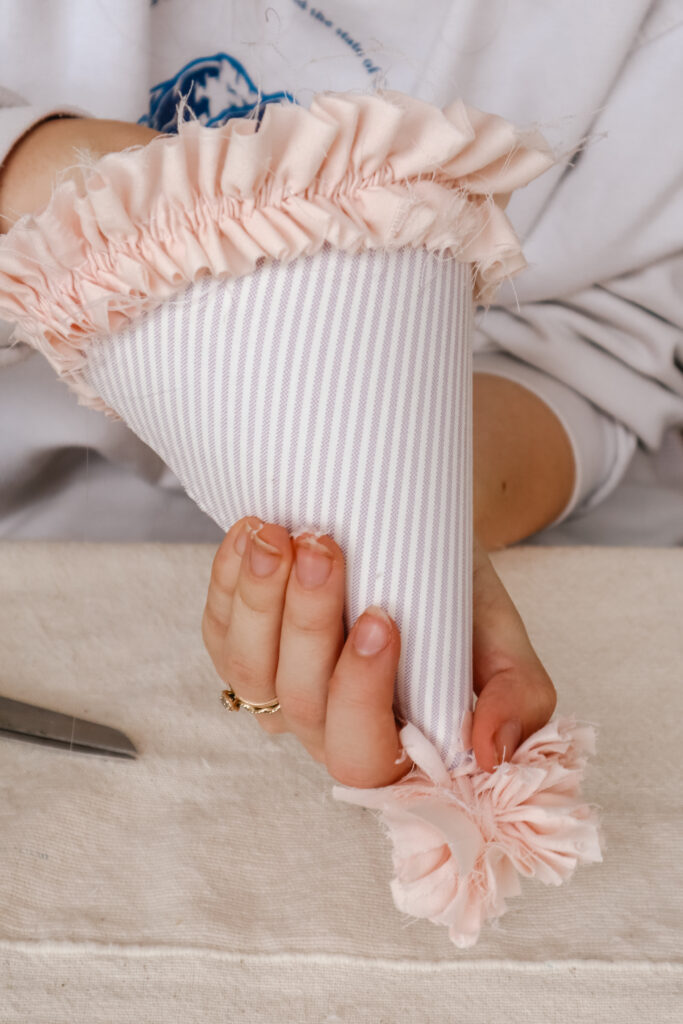
You may need to make the point of your cone slightly larger, if so, just trim off the very tip. Find the strand of fabric that was used to knot the pom-pom and pull it through the tip of the cone.
Add some glue to the inside of the cone and carefully press the fabric to secure it.
Step 9: Add Your Elastic & Your Done!
Lastly, measure a comfortable length of elastic. Snip two small holes on opposite sides of your hat and thread your elastic through it. Knot it to itself to secure.
And your DIY birthday hat is complete! Your hat is now ready to be enjoyed by your child for many birthdays to come.