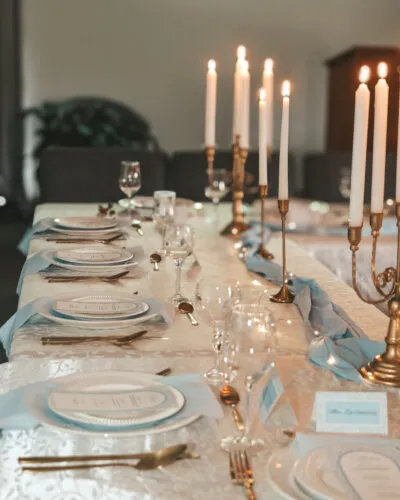
Whether you’re hosting a baby shower, wedding, birthday party, or bridal shower, this DIY sign stand is sure to come in handy! With just a few basic materials, you can make your own wooden backdrop stand.

I found it impossible to find an elegant and affordable sign stand for my events. That’s why I’m so excited to share this DIY Sign Stand! Perfect for so many different events with its timeless design.
This wooden backdrop stand is affordable (mine cost only $25 USD), easy to build, and can be disassembled for storage.
In this tutorial, I will share all the materials needed and step-by-step instructions to build your stand.
By the end of this post, you will be equipped with the knowledge to build your own DIY sign stand ready for your next big event!
This post is all about how to make a DIY sign stand for weddings, parties and other events.
DIY Sign Stand Tutorial
The height of my backdrop is just over 180cm tall and 90cm wide. You can easily follow these same steps, but change the measurements if you want to customize the size.
I’d also like to take a moment to thank my amazing husband for his help in constructing this stand. The whole assembly took just 30 minutes!
What You’ll Need:
- 2x 180cm long 18mmx18mm pine trim
- 4x 90cm long 18mmx18mm pine trim
- 1x 100cm 12mm pine dowel
- 8x 50mm screws
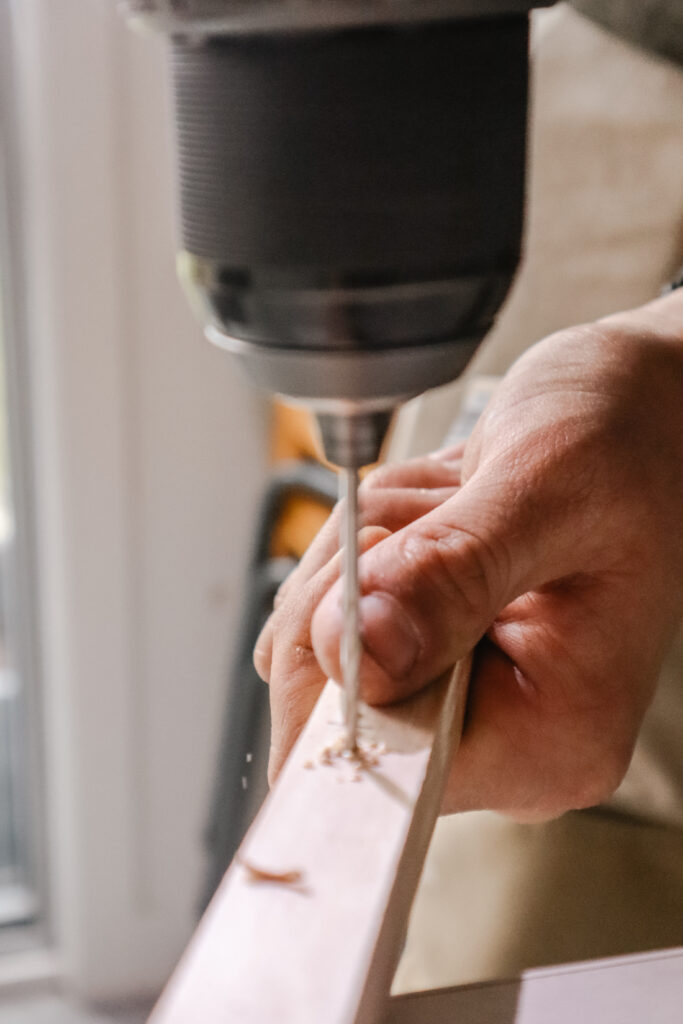
- Drill
- 2.5-3mm Drill-bit
- 12mm Drill-bit
Creating the Base
Step 1: Measure and cut your side pieces to size

Begin by taking a 90cm long piece of pine and measuring exactly halfway through (should be 45cm each side).
Mark this measurement and use it as your guide to cut your piece straight in half. These 2 pieces will be the sides of your frame.
Step 2: Attach the sides to the front and back of frame

Begin by taking your side piece (45cm piece) and lining up the end to the inside edge of your front piece (90cm piece). They should be hard up together to create a corner.
Holding these pieces firmly together, pre-drill through the front of your front piece into the centre of the side piece. Then using a screw, drill through your front piece carefully to avoid splitting.
Line up the end of your screw with the predrilled hole in your side piece and drill till the screw is flush.
Step 3: Repeat the previous step until you have a completed rectangle frame

Creating the Top Frame
Step 4: Create grooves for your dowel

To make grooves for the ends of your dowel to sit in, take your long side pieces (180cm) and measure down 15cm from the top. Mark this measurement in the centre of both dowels.
Using a 12mm drill-bit, drill on the spot you marked down to about halfway through the wood. This will create a 3mm deep groove on each side.
Step 5: Attach the top to the sides

With your top piece (90cm piece), line up your side pieces hard against each edge piece to create your corners.
Pre-drill through the top and into the middle of your side pieces. Then using a screw on each side, screw your pieces together.
Putting it All Together
Step 6: Measure and mark where you’ll attach the sides

On your base, mark the centre of the short side on each side. Once you’ve found the center, mark another line 9mm from the centre. This line will be what you line up with to ensure your screw goes into the center of the adjacent piece.
As you can see from the image above, the star is where the centre is, but the line is where we will line up the side of our wood.
Step 7: Predrill and screw your sides to the base
Begin by predrilling through where you marked the centre to be. Next, you may need 2 people to help you hold both sides evenly and securely in place.
With the sides lined up pre-drill through the centre hole and into the middle of the side pieces. Then take your screw and drill it in through both pieces.
Step 8: Trim your dowel to size and insert
The final step is to measure and cut the dowel to the desired size. Double-check how long you think you’ll need this to be, but it should be cut to about 92cm in length.
Once this is done you should be able to slip each end of your dowel into the grooves you created.
And you’re done! Stay tuned for next week’s post as I share how to make a banner for your sign stand.